Running your own AI chatbot no longer requires expensive APIs or cloud-hosted AI platforms. With Ollama and Docker, you can deploy a powerful, private, and fully self-hosted AI chatbot that runs entirely on your own system.
This step-by-step guide will show you how to create an AI chatbot using Ollama inside Docker, making it perfect for development, testing, or production use.
- Why Use Why Use Ollama and Docker for an AI Chatbot?
- Prerequisites
- Step 1: Create the Docker Compose File
- Step 2: Start Ollama in Docker
- Step 3: Download an AI Model
- Step 4: Run the AI Chatbot Locally
- Step 5: Use the Ollama API for Chatbot Integration
- Step 6: Build a Chatbot User Interface (Optional)
- Security Best Practices
- Performance Optimization Tips
- Final Thoughts
Why Use Why Use Ollama and Docker for an AI Chatbot?
Ollama and Docker work together to simplify AI deployment while keeping everything under your control.
Key benefits include:
- Full privacy with local AI processing
- No recurring API or token usage fees
- Portable Docker-based deployments
- Support for popular LLMs like LLaMA, Mistral, and Gemma
- Ideal for internal tools, chatbots, and testing environments
This setup is especially useful for developers, businesses, and IT teams looking to integrate AI without relying on third-party services.
Prerequisites
Before getting started, make sure you have:
- Docker Desktop and Docker Compose installed
- At least 8GB of RAM (16GB recommended)
- A Linux server, macOS system, or Windows with WSL2
- Basic command-line experience
GPU support is optional but can significantly improve performance.
Step 1: Create the Docker Compose File
First, create a Docker Compose file to run Ollama in a container.
Create a file named docker-compose.yml:
version: "3.9"

services:
  ollama:
    image: ollama/ollama:latest
    container_name: ollama
    restart: unless-stopped
    ports:
      - "11434:11434"
    volumes:
      - ollama_data:/root/.ollama

volumes:
  ollama_data:
This configuration exposes Ollama’s API, ensures models persist between restarts, and keeps the container running automatically.
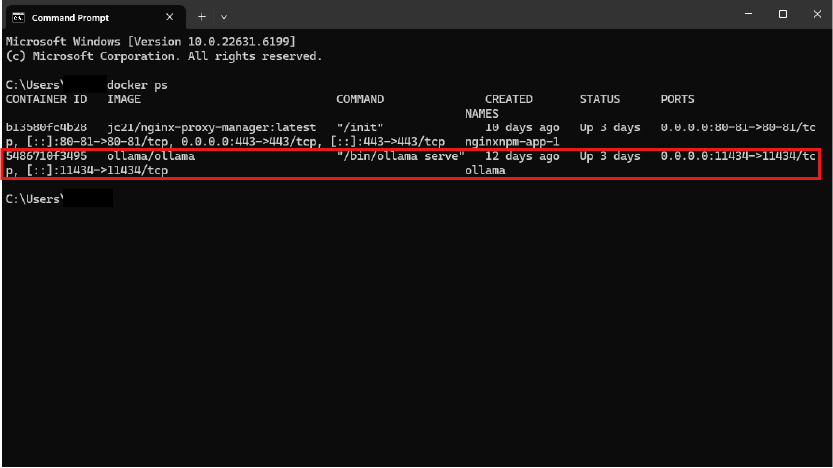
Step 2: Start Ollama in Docker
From the directory containing your compose file, run:
docker compose up -d
To confirm Ollama is running:
docker ps
You should see confirmation that the API is listening on port 11434.
Step 3: Download an AI Model
Next, download a language model inside the container:
docker exec -it ollama ollama pull llama3
Popular models include:
llama3mistralgemmaphicodellama
Once downloaded, models are stored in Docker volumes and do not need to be reinstalled.
Step 4: Run the AI Chatbot Locally
You can immediately start chatting with the AI:
docker exec -it ollama ollama run llama3
At this point, your local AI chatbot is fully operational.
Step 5: Use the Ollama API for Chatbot Integration
Ollama provides a REST API that allows you to connect your chatbot to:
- Web applications
- WordPress plugins
- Python or Node.js apps
- Internal tools and dashboards
Example API request:
curl http://localhost:11434/api/generate \
  -d '{
    "model": "llama3",
    "prompt": "Explain Docker in simple terms"
  }'
Responses are streamed in real time, making this ideal for chat interfaces.
Step 6: Build a Chatbot User Interface (Optional)
You can create a frontend using:
- JavaScript and Fetch API
- React or Vue
- Python (Flask or FastAPI)
- WordPress REST endpoints
Typical chatbot workflow:
- User submits a message
- The message is sent to the Ollama API
- The AI generates a response
- The response appears in the chat window
This design keeps your UI simple while Ollama handles the AI processing.
Security Best Practices
Before exposing your AI chatbot publicly, consider the following:
- Do not expose port 11434 directly to the internet
- Use a reverse proxy like Nginx or Apache with HTTPS
- Add authentication or API key validation
- Apply rate limiting to prevent abuse
- Separate testing and production environments
For WordPress-based chatbots, Ollama should remain server-side only.
Performance Optimization Tips
- Choose smaller models for faster responses
- Allocate sufficient memory to Docker
- Enable GPU passthrough if available
- Pre-load models during startup
Final Thoughts
Creating an AI chatbot using Ollama and Docker gives you full control, predictable costs, and strong privacy. Whether you’re experimenting with local AI, building internal tools, or integrating AI into a WordPress site, this approach provides a scalable and production-ready foundation.
Self-hosting your AI chatbot is no longer complicated—and Ollama makes it easier than ever.
In my next post, we’ll visit creating a WordPress plugin to connect your chatbot to your website.